Uploading Machine Raspberry Pi Google Photos Drive
Mounting Google Bulldoze on Raspberry Pi
The Raspberry Pi is a great little device to run a variety of services in your home network. It saves files on a user-provided SD carte du jour or USB stick. But what if you want to store files off-device to safeguard the piece of work that you've put in to prepare upwards whatever services y'all're running on your Pi? What if you would similar to share files between multiple Pis? Or what if yous have files like your photos living in the cloud already and yous'd like to hands admission them from your Pi? This article shows how you tin connect your Google Drive to your Raspberry Pi for all the to a higher place use cases and more.
Which Software to Utilize?
The start thing we have to make up one's mind is which software to use. When you await effectually for software to connect Google Bulldoze to a Linux environment you run across projects with a broad range of different features and requirements. Some are better maintained than others. The one I've called here is rclone, which is actively maintained and provides a lot of functionality. In particular, with the help of the FUSE userspace filesystem layer, it allows yous to mount Google Bulldoze as part of your Linux file system, which profoundly simplifies using the cloud storage from your Pi. These instructions volition probably also work on most other Debian Linux based distributions with picayune or no modify.
Rclone is much more than versatile than the limited usage described in this article. It doesn't but support Google Drive but a whole host of other deject storage providers as well, such equally Amazon Drive, Dropbox, or Microsoft OneDrive to name just a few of the larger ones. Also assuasive you to mountain one of those cloud storage services into your file system, it also provides a set of CLI commands to direct manipulate files on those services. In this article, all the same, we won't use them and concentrate on using rclone mount.
The installation instructions beneath assume that you are logged in to your Raspberry Pi and execute all instructions there, unless otherwise noted.
Installing Rclone on Raspbian
The easiest manner to install rclone is to use the pre-compiled Debian bundle:
sudo apt-get install rclone As of this writing, the current release of Raspbian is based on Debian v.9 (Stretch), and the version of rclone we get via apt-go is 1.35. Yet, rclone has progressed to version 1.47 in the concurrently. To become a more up-to-date version, instead of using the apt bundle that comes with the default Raspbian package repositories, nosotros're going to install an up-to-date rclone bundle from its download page:
          cd /tmp
wget https://downloads.rclone.org/v1.47.0/rclone-v1.47.0-linux-arm.deb
sudo apt install ./rclone-v1.47.0-linux-arm.deb
rm rclone-v1.47.0-linux-arm.deb
Configuring Rclone
Since the remote files we're going to access are private to a particular user, rclone keeps configuration files separate per user. All secret access tokens necessary to interact with the deject storage are stored in a user'south config file such that different users tin can't access each other's cloud storage. Past default the config file is located in $HOME/.config/rclone/rclone.conf and should have permissions of 0600 (read-write only for file owner) to make certain your admission tokens remain private.
For Google Drive there is some other consideration. If y'all go with the default configuration, you're using the client_id that corresponds to the rclone application. Google imposes per-client charge per unit limits on interactions with Google Drive. This means that by using the rclone default client_id you're competing against all other users of rclone, globally, for operation bandwidth to Google Drive. Fifty-fifty though the rclone authors endeavor to mitigate this by asking Google for higher quotas, using the default is non an ideal state of affairs. For this reason we'll ready our ain client_id with Google and avoid the stampede.
Getting a Google Bulldoze Client ID
In a browser go to the Google Developer Console and log in with your Google account. You don't have to exercise this on your Raspberry Pi. Any estimator is fine.
- On the peak go to Select a project → New Project
- — — Fill in a Project Name: my-rclone-gdrive-access
- — — Hit Create
- Just below the top select + ENABLE APIS AND SERVICES
- — — Search for Drive
- — — Select Google Drive API
- — — Hitting Enable
- On the left side-console select Credentials
- — — In the main panel yous'll get a warning virtually
Remember to configure the OAuth consent screen with information about your application.
- — — Adjacent to the warning select CONFIGURE CONSENT SCREEN
- — — Fill in the Application Proper noun: my-rclone
- — — Striking Add Scope
- — — — — Pick ../auth/drive (which can "run into, edit, create, and delete all of your Google Bulldoze files") and hit Add
- — — Striking Save
- Go back to Credentials on the left side-panel and then Credentials on the top menu inside the main panel
- — — Select Create credentials → OAuth client ID
- — — Select Application type: Other and set some sensible name: my rclone client
- — — Hit Create
- You'll get a confirmation folio containing the client ID and client secret which looks like this.
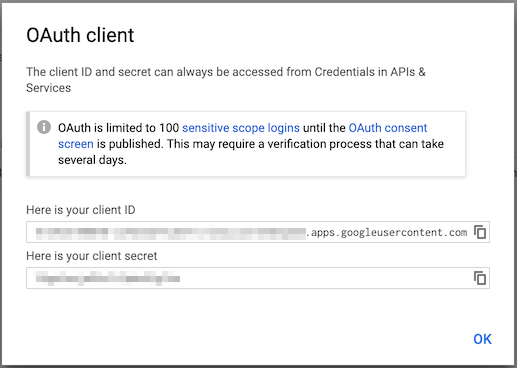
Copy the client ID and client undercover since we'll demand it for the rclone configuration.
Setting up the Rclone Configuration
Back on the Raspberry Pi log in as the user who should be able to access the Google Bulldoze files and run:
rclone config Select the following answers:
          No remotes constitute - brand a new ane
n) New remote
s) Set configuration password
q) Quit config
northward/s/q>            n
name>            gdrive                    Type of storage to configure.
Enter a cord value. Press Enter for the default ("").
Choose a number from below, or type in your own value
            ... snip ...
12 / Google Drive
            \ "drive"
            ... snip ...
Storage>            12
Come across assistance for drive backend at https://rclone.org/bulldoze/          Google Application Client Id
Setting your own is recommended.
Encounter https://rclone.org/drive/#making-your-ain-customer-id for how to create your ain.
If y'all leave this blank, it will apply an internal key which is low performance.
Enter a string value. Press Enter for the default ("").
client_id>            425159802070-tup27t8cv4h2z3cjkqfmft4n8gju76lf.apps.googleusercontent.com
This is the customer ID that you saved in the previous step.
          Google Application Client Hole-and-corner
Setting your ain is recommended.
Enter a string value. Press Enter for the default ("").
client_secret>            MspFTowlsy0SUSRm-1RvcTyx
This is the client secret that you lot saved in the previous stride.
          Telescopic that rclone should apply when requesting access from drive.
Enter a string value. Press Enter for the default ("").
Choose a number from below, or blazon in your own value
1 / Full access all files, excluding Application Data Binder.
            \ "drive"
            ... snip ...
scope>            one                    ID of the root folder
Leave blank normally.
Fill in to access "Computers" folders. (see docs).
Enter a string value. Press Enter for the default ("").
root_folder_id>          Service Account Credentials JSON file path
Leave blank commonly.
Needed only if you want use SA instead of interactive login.
Enter a cord value. Press Enter for the default ("").
service_account_file>          Edit advanced config? (y/northward)
y) Yes
n) No
y/northward>            n                    Remote config
Use car config?
            * Say Y if non certain
            * Say Due north if you lot are working on a remote or headless car
y) Yes
north) No
y/north>            northward                    If your browser doesn't open automatically go to the following link: https://accounts.google.com/o/oauth2/auth?access_type=offline&client_id=425159802070-tup27t8cv4h2z3cjkqfmft4n8gju76lf.apps.googleusercontent.com&redirect_uri=urn%3Aietf%3Awg%3Aoauth%3A2.0%3Aoob&response_type=code&scope=https%3A%2F%2Fwww.googleapis.com%2Fauth%2Fdrive&state=18109698827ea077947354ca9dab0b80
Log in and qualify rclone for access
Copy the URL that gets printed on your screen to a new browser window. You tin do this on any computer, it doesn't have to exist your Pi. In the page period that follows select your user account (if required) and confirm that you want to give your awarding access to your Google Drive. Re-create the verification code from the confirmation page and make full it in beneath.
          Enter verification code>            4/PzWg7ZOEvXIoa9tI7OMjerPq_X5UpsES5ayNvtG8Gf9TK30FERTVrCM                    Configure this as a team drive?
y) Yes
n) No
y/north>            n                    --------------------
[gdrive]
type = drive
client_id = 425159802070-tup27t8cv4h2z3cjkqfmft4n8gju76lf.apps.googleusercontent.com
client_secret = MspFTowlsy0SUSRm-1RvcTyx
scope = drive
token = {"access_token":"xa14.Gv7qcPS5TvrumTpNplGxg5Ndct1gd6yica0d80iFjbKXJ3KpgneZLvn-Tg-YgLPXcEesHubbBcyyeEjGGb9mP5GhwLnEDxaPhPS3fj6ddTcmMUUOdjOhYW-rb1xY","token_type":"Bearer","refresh_token":"1/8jxfWbRseQmqrb5aebwK9zfwZRH0IjZhv-9lmtqsVC8",
"decease":"2020-01-23T16:21:03.502362868-07:00"}
--------------------
This last section shown above is a re-create of the information that volition be put into the $HOME/.config/rclone/rclone.conf config file. If everything looks right nosotros're going to take it and go out the configuration menu.
          y) Yes this is OK
eastward) Edit this remote
d) Delete this remote
y/eastward/d>            y                    Current remotes:
Name                 Blazon
====                 ====
gdrive               bulldoze          e) Edit existing remote
n) New remote
d) Delete remote
r) Rename remote
c) Copy remote
due south) Set configuration password
q) Quit config
e/northward/d/r/c/s/q>            q
You can now test that you lot have set up the configuration correctly with:
rclone ls --max-depth 1 gdrive: This rclone command should show you all regular files in the top-level directory of your Google Drive. The next step is to test mounting Google Bulldoze into your file system:
          cd ~
mkdir -p mnt/gdrive
rclone mountain gdrive: $Abode/mnt/gdrive
In a 2d terminal on your Raspberry Pi run:
ls -l ~/mnt/gdrive This should again list all files in the top-level directory of your Google Drive. Since your cloud storage is now role of the regular file organization, any program on yous Pi can access it just similar any other file. Later this test stop the to a higher place rclone command in the first terminal with Ctrl-C.
Automatically Mounting Google Bulldoze
The setup above is all that is necessary to employ the rclone mount command and mount Google Drive by hand into your file system whenever yous demand it. However, that is a bit cumbersome. Information technology would exist meliorate if Google drive were mounted automatically whenever the corresponding user logs in. This can exist achieved with systemd, a daemon that starts and stops services when needed. Systemd operates in i of two modes, a — organisation mode that handles motorcar-wide services such every bit bringing up networking, and a — user mode that deals with per-user services such equally starting the desktop environment and in our case we want it to mountain the rclone FUSE file system for Google Drive. A expert identify to learn more than is the archlinux wiki for per-user systemd.
Configuring Systemd
To tell systemd what to practice it depends on configuration files in some standard locations. Ane of these locations where systemd looks for user config files is $HOME/.config/systemd/user. To take the rclone FUSE file system mounted automatically at login we'll create a ~/.config/systemd/user/rclone@.service file with the post-obit contents:
          [Unit]
Clarification=rclone: Remote FUSE filesystem for cloud storage config %i
Documentation=human being:rclone(1)          [Service]
Blazon=notify
ExecStartPre=/bin/mkdir -p %h/mnt/%i
ExecStart= \
            /usr/bin/rclone mount \
            --fast-list \
            --vfs-cache-mode writes \
            --vfs-cache-max-size 100M \
            %i: %h/mnt/%i          [Install]
WantedBy=default.target
Note: If you're using rclone version < i.46, remove the
--vfs-enshroud-max-sizeline, as that flag is not yet supported in earlier versions.
Here the special @ syntax in the config filename defines a service template which allows to write a single config file that can be used for multiple instantiations. Fifty-fifty though we wouldn't really need a service template for our uncomplicated utilise instance, we use it then the configuration already supports multiple mounts, e.m. if you also want to use it for other cloud storage providers as well. When using the systemd service name, which derives from the file name, you lot just suspend an instance name to @ and systemd will replace all occurrences of %i in the config file with that instance name. In our case the instance name represents the rclone remote name which we accept configured in the rclone.conf file above, i.e. gdrive in our case.
On the rclone mount command line above we use a particular set of mount options that are supported for Google Bulldoze. A total list of options can be plant in the rclone Google Drive documentation. More than details on general mount options tin can exist constitute in the rclone mount documentation.
Once nosotros've got the config file in identify we need to allow systemd know about the new configuration for our gdrive rclone remote:
systemctl --user enable rclone@gdrive This should install a symbolic link rclone@gdrive.service -> $Dwelling/.config/systemd/user/rclone@.service in ~/.config/systemd/user/default.target.wants/.
Now that systemd is enlightened of the new service, the next step is to plow it on:
systemctl --user start rclone@gdrive One time turned on, when yous listing the mount directory
ls -l ~/mnt/gdrive you should see the contents of your Google Drive directory again.
At this betoken what nosotros accept achieved works neat for interactive user sessions. Every time you log in to your Raspberry Pi as the user for which you accept prepare up Google Drive, it is mounted automatically into the file system which gives you lot access to the contents of your cloud storage.
Starting User-Systemd at Boot Time
For some employ cases, mounting at user login fourth dimension is still non quite plenty. For example on my arrangement I run an RStudio Server, which is a web IDE for the R programming language. The RStudio Server web interface start presents a login folio to cosign the user. Once it has checked the user's credentials information technology starts an rsession for them. However, starting an rsession with the UID of the authenticated user doesn't constitute a login or session for that user. Thus no systemd user session is started and the actions that would mountain the deject storage are not performed, so the RStudio IDE doesn't have admission to the cloud storage directory of the user.
There is a solution to this problem though. We tin can instruct systemd to beginning a user session at kicking fourth dimension instead of login time with the following command:
loginctl enable-linger $USER Now, whenever our Raspberry Pi reboots, a systemd user session is started immediately for that user, mounting the configured Google Drive and enabling use cases like RStudio Server mentioned above.
If yous've followed the setup to here, congratulations! Y'all've got your Raspberry Pi continued to your Google Drive and can hands access files from your cloud storage from whatever programme running on your Pi only by accessing files under $HOME/mnt/gdrive.
2019–05–13 — Eddies in Entropy
Source: https://medium.com/@artur.klauser/mounting-google-drive-on-raspberry-pi-f5002c7095c2
0 Response to "Uploading Machine Raspberry Pi Google Photos Drive"
Post a Comment